If you often find yourself needing a ladder to climb your roof, you have to learn how to make a roof ladder hook.
Any roof has a sloping surface that makes it especially difficult to mount and get on. There are safety guidelines in using a ladder, but following all of them would not guarantee accidental slip-ups will not happen.
To make ladder-climbing sturdier and safer, you need to attach it with a roof ladder hook.
You have the option of buying one, which you can, but those kinds come with disadvantages.
For one, the roof ladder hook may not be compatible with your ladder and cannot fasten. Some ladder hooks can only attach themselves to ladders of the same brand.
Secondly, ladder hooks are a bit on the expensive side, and instead of buying one, why not make one?
Table of Contents
What are the tools and materials that you need to make a roof ladder hook?
- Twelve foot ladder
- Six plywood boards (two long and four short pieces)
- Drill
- Wooden boards
- Two clamps
- Protractor
- Wood saw
- Screws
- Marker or pencil
- Nails
- Measuring tape
What are the ladder safety guidelines that your should follow?
- Check on the weight rating first of the ladder.
- Inspect the ladder before utilizing it for any tasks.
- Be sure it is stable and steps are firm before starting to climb it.
- Be sure that you are also stable and not wobbly as your stand or climb on the ladder.
- Avoid carrying numerous items when you are climbing on the ladder.
What are other safety procedures that you should follow?
Besides the ladder safety guidelines mentioned above, you still have to observe safety measures in making a DIY roof ladder hook and working on the roof.
Before learning how to make a roof ladder hook, you have to know about the following safety precautions:
- Wear appropriate clothing and protective gear- When working with hot metal, use protective clothing, goggles, and thick worker’s gloves.
- Exercise caution when working on potentially harmful equipment- Always be careful in using a hammer and nails because any mistakes will cause harm to yourself and incur more damage to your roof.
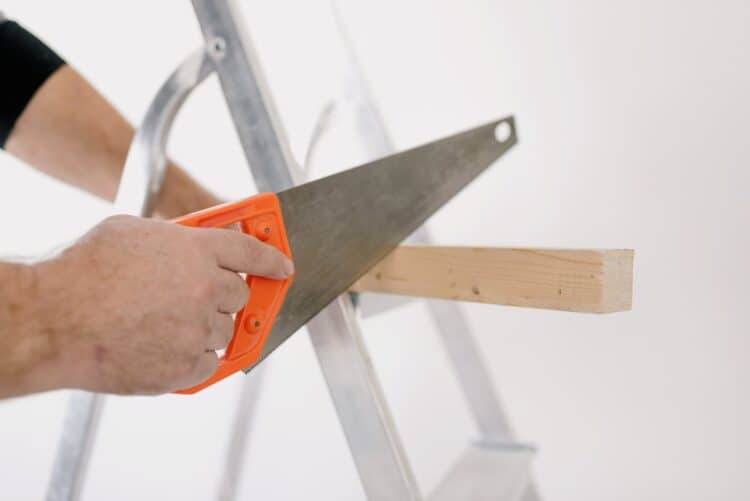
Make sure all the potentially harmful equipment are not strewn about your workspace, and nobody would accidentally step on them. - Working with a saw is especially challenging and can potentially sever your limbs. Keep your hands at a safe distance when using it, and cut the wood without removing it with each stroke.
- Your ladder might have safety locks, and make sure it is functioning properly and in good condition to avoid any potentially harmful slip-ups.
- Do not work alone on your roof without someone looking and checking on your progress. This person is called a spotter who functions as an assistant of sorts. And also can prevent potentially deadly accidents from happening.
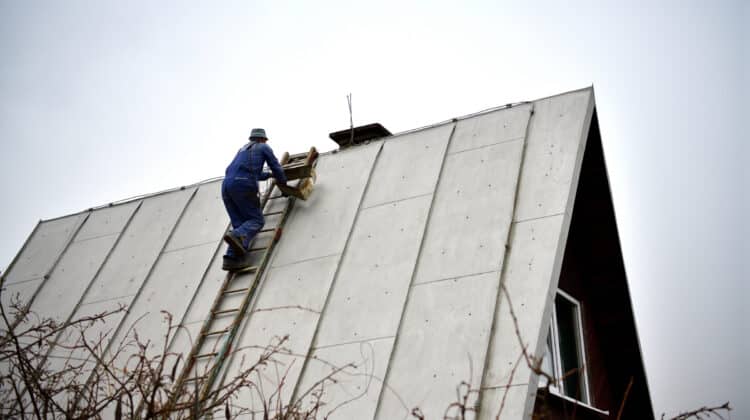
- If you are using a ladder on the roof, be sure there is a roof ladder hook attached to the end, along the peak to anchor it firmly. In the absence of a roof ladder hook (since you will be still making one), you can use a piece of rope as an anchoring tool.
- If your roof has electrical power lines close by, make sure to steer clear from them. Or call a professional roofer instead to do the job since the risk is not worth it.
- A harness can add additional safety for your work on the roof, so if you can afford it, do get one and make sure it is a quality harness. Attach it to your body and a strong and stable portion on the roof. If your ladder malfunctions, the harness will save you from an accident.
- Sine you will be spending hours on roof activities, you have to make sure it has stable integrity since you will be transferring the weight of your body on it. An excellent way to do this is by going to the attic and inspect the beams and other portions of the ceiling.
- If your roof is made of asphalt, then it is delicate. It means it needs padding when you place a ladder on it. The best ones to get for this are ladder pads.
- The duty rating of the ladder will inform you on how heavy it can only carry. This amount is usually marked on the ladder that you should be aware of before climbing on it.
Also, check on the rung locks, and the spring-loaded ones are the safest and most stable. - Clear out any debris or dirt on the roof to avoid any accidental slippage since you will be placing a ladder and walking on it.
- Avoid working on the roof after the rain has occurred since it will make it slippery. But if you have to, try doing all the roof work on the ladder.
- If you have a fear of heights or vertigo, do not even attempt to climb the ladder. That is an accident waiting to happen, so it is best to leave the roof work to professionals.
- Make sure the ladder rungs are in a horizontal position to avoid any slip-ups.
- Do not swing the ladder to a fro while on it, even though it is firmly anchored by a roof ladder hook. You might slide off and harm yourself and also destroy both the ladder and hook.
What are the steps in how to make a roof ladder hook?
Doing anything on a ladder is a delicate business. You have to be on your toes whenever using it, and one mistake and disaster happens.
A ladder is a useful tool for a professional roofer or a DIY handyman such as yourself. To be able to do safer work with a ladder, you need a roof ladder hook.
Instead of buying one, you make one yourself, and fortunately, it is not hard to do.
You can make one made of steel (which is harder to do since you will need a torch and metal bars) or wood.
A roof ladder hook made of wood is easier to do, which will be shown in the steps below.
1. Measure the wood pieces needed
The first step in the process is to take measurements of the pieces of wood to make sure they will suit your needs. Take the two wooden boards beside each other to determine if they have the same width and length.
You can use a tape measure to know their dimensions, and if they’re not the same, use the wood saw to cut them to be the same.
Once the two boards have the same length and width, measure two-thirds of the length and mark them with a marker or pencil. This way, they are even by the time you will be attaching them to the ladder.
2. Situate the wood pieces on the ladder
Place the ladder on an elevated platform to imitate the roof slope. Then take one wooden board you have just measured and place it on the outer part of the ladder.
The longer portion should be on the lower side and the shorter part on the upper side. Utilize one clamp to attach the wood board to the ladder to make it easier to work on it for consecutive steps.
3. Drill wood and ladder
With a piece of wood clamped together on the outer side of the ladder, drill a hole that goes through the wood and the ladder. If you have situated the board properly on the correct angle, you will only need one hole.
You have to remember that the roof is not ninety degrees, but about forty-five degrees.
Do the same thing with the second board on the other side of the ladder. Once done, put the nuts and bolts or screws through the holes and make sure they are tight.
4. Determine the angle of the ladder and wooden boards
Since both boards are now firmly attached to the ladder, you angle them precisely to fit the top of your roof. If you can measure your roof angle, use a protractor to angle both the boards the same way as the rooftop.
If you do not have a way to measure your roof angle, you can form an estimation for now and adjust later.
Then adjust the boards to the proper angles like your roof and make sure both of them are fastened precisely the same way. If they are not attached correctly, the ladder will not be stable and flimsy once it is on the rooftop.
5. Locking the proper angle
Once getting the correct angle that can fit the exact measurements of your sloping roof, you need to make them sturdy. Take one of the smaller wood pieces and drill it along with the ladder in its inside rung.
Put in a nut and bolt or screw to set in in place on the ladder. Do not make it too tight since you may have to adjust it later.
Connect the shorter wood to the longer one that has been properly angled. Drill a hole on the two wood pieces and put a nut and bolt or screw to secure them. Do the same process with another smaller board on the other side.
6. Make the boards secure by adding reinforcements
After fastening the bigger and smaller boards securely, you need to further reinforce them, so that it is powerful enough to carry your weight.
There are two areas you need to do this: the spot where the two wood pieces conjoin and on the other end of the longer wood pieces.
In the first reinforcement, bring the board piece and measure it to fit below the joint, right in between the two pieces already fastened to the ladder. After measuring, cut any excess wood.
Drill a hole to pass through the new piece to the longer one and put a nut and bolt or screw on it. Do the same process to the other wood.
Drilling holes on the wood pieces might make it weaker, so you can use nails instead.
For the second reinforcement, measure a wood piece to link the two longer pieces on the other end. Cut excess and use screws or nails to attach the two pieces.
Doing this will protect your roof from possible damage from the force exerted by your weight since the stress will be on those reinforcements. They will also keep the ladder in position and keeps its angles stable.
7. Reinforce your roof ladder hook further
Go back to the first two holes you have drilled, which now have been screwed firmly. Drill a hole on each side and put nuts and bolts or screws in. These will further reinforce it and make it sturdier.
Find other spots that feel flimsy and wobbly and do the same procedure to make the whole contraption stronger.
8. Make tests
After reinforcing the weaker portions, it is time to test your roof ladder hook. Carry it towards the roof by lifting it up and slowly lowering the hook part on the roof’s peak.
Be sure not to slide it along the roof, or you might damage it and the roof itself. Check on its firmness for the last time since it will be carrying the weight of your body.
9. Put the roof ladder hook on the roof
Now you know how to make a roof ladder hook. You can slide it back and forth on the roof to move it. Always be careful when doing any roof work, and if you can help it, leave it to professional roofers to do the tasks instead of you.
What are the steps in making a metal roof ladder hook?
A roof ladder hook made of metal might be a bit more difficult to do than the one made of wood. And also, a little dangerous since you with hot metal and a blowtorch. But by following these steps below, you can easily make one.
Materials and tools that you need
- Metal or steel bar
- Blowtorch
- Metal clamps
- Wood pieces attached at a forty-five-degree angle, forming a V
1. Construct the V-shaped wood pieces
Fashion two pieces of wood to have a forty-five-degree angle. You will need it to shape the metal into a hook.
Once done, the V shape will be inverted, and the two ends will be placed on the ground. Make sure it is planted firmly and does not topple over.
You also need to measure the roof edge or have a general sense of how it looks like. It will inform you of the shape of the hook and make it fit securely on the peak of the roof.
2. Bending the metal
If you can select from the many kinds of metal, the best one to make a roof ladder hook would be made of steel due to its reliability. Other metal types might be easily stressed and bend out of place from too much weight.
Steel is solid and sturdy and will not warp under tension.
Set the steel bar on one side of the inverted V-shaped wood, and about half of the bar is hanging out from the V-shape’s apex portion. Use one of the clamps to grip the steel with the wood.
Use the blowtorch to heat the middle of the steel bar until it is glowing red. And be careful when using it, and a lot of things can go wrong by mishandling it.
Once the metal is pliable, use the other metal clamp to bend it down to the other V-shaped leg and touch it. It does not need to be exact, as long as it can fit the thickness of your roof and have a little room to move to and fro.
3. Make handles
You need to create handles for the hook to be able to hold one end of the ladder and the roof on the other. These will make gripping easier on top of the roof.
You only have to heat the end of the hook and create a makeshift handle. You can make it to your specifications by adding a cloth or rubber so that it would not damage the roof upon contact.
4. Test it out
Your makeshift metal roof ladder hook is done. Check first if it can fit the peak of your roof snugly, and it can attach itself securely on the ladder.
It does not need precise, and as long as it is firm and secure on both ends, you’re good to go.
You can also make another hook of the same size and shape. This way, two hooks can make better support for yourself and the ladder.
Are there any FAQs or frequently asked questions?
Is a roof ladder hook safe to use in my home?
You will discover that roof ladder hooks are indispensable tools for DIY repairs in your home. Without it, you will not feel secure when climbing a ladder.
Even if you end up buying a roof ladder hook instead of making one from wood or metal, it comes with certain advantages.
For one, the newer ones have adjustable locks that can secure any kind of ladder. They are also powerfully made and can fold flatly on any surface.
They are comparatively better than the older brands that can be compatible with any kind of ladder.
Roof ladder hooks have many uses in your home and help you fix faulty areas in your household like weak decking, steep chimneys, icy rooftops, or repairing antennas.
Is it alright to place a ladder against a gutter?
You should not lean your ladder against the roof gutter because it can potentially destroy it. It can also result in clogging and additional issues that you will end up fixing later.
Instead of the gutter, try to find an area without it yet still stable enough to support the ladder. Or you can lean it on the side underneath the gutter or any other area strong enough to hold you and the ladder’s weight.
How can you enable the ladder to be secure on the roof?
To make sure that the ladder will be secure on top of the roof, you have to get it at the level where the eaves are situated. Then, if your ladder has wheels, push it on the roof and flip it over as it reaches the peak and onto the bearers.
If the roof ladder hook that you have made can fit the ridge board of your roof, then both the hook and ladder will be secure.
How can I choose the best roof ladder to do roofing work?
In doing roofing patch-ups and other tasks, you need an excellent roof ladder to attach with the roof ladder hook you have just made.
Here are some tips to find the right roof ladder that suits your roofing needs:
- Look for a roof ladder made of aluminum. This kind of material is not only strong and durable, but it is also light, which makes using it safer and efficient. Look for good brands like Abu Werner, Titan, or Lyte.
- Always opt for a trade ladder instead of a cheap one. With trade products like ladders, you are assured that they are made to endure wear and tear and will suit any work environment.
- Make sure that the roof ladder is the right size for your roof. If you will be using it for different roof sizes, an extending roof ladder will be a great investment.
- Select a roof ladder that has non-slip serrated rungs. These can enable a more secure grip when walking on them and lessen accidental slip-ups.
- You have to be sure that you have purchased a long roof ladder, which has to be three rungs above the roof gutter. It should be also long enough to cover the eaves towards the roof ridge.
Conclusion
The importance of roof ladder hooks should be emphasized more and can even save your life. Without it, the ladder would not be secure, and accidents will happen.
Making a DIY roof ladder hook from either metal or wood is not hard to do. With a little creativity and practical judgment, you make one so you would not have to worry anymore when working on your roof.


