To maintain a smooth and healthy lawn, not only do you need to mow at regular intervals, but you also have to remove grass clippings and other dirt from your lawn after mowing. Attaching a bag to your lawnmower would eliminate this work.
Table of Contents
Read this to learn how to attach a bag to a lawnmower the most efficient and effective way.
Raking the specks of dirt and clippings every time after mowing is a lot of work, especially if you have a large yard. But the bag would collect all of the grass clippings as you move your mower around the yard to do its work.
So if you wish to give your lawn a neater and smoother look by removing the clippings that come off when mowing, then you should learn how to attach one of these grass catcher bags to your lawnmower. It’ll help you achieve the desired result for your lawn, with half the effort.
To attach a bag to the back of your lawnmower, first, you need to remove the mulching plate at the back. Locate a hanger. It could be a hook or a bolt. Then attach your catcher bag to the hanger.
If you don’t do this right, it can cause the grass clippings to get trapped in the blade. Thereby hindering the blade from working effectively.
To fix the bag on the side of your lawnmower, first, detach the spark plug from the lawnmower. Remove the mulching plate through the discharge area, then attach a tube. Then place your bag on the hanger by the side, ensuring that the tube fits directly into the bag’s opening.
Safety precautions, and things to keep in mind before attaching a catcher bag to your lawnmower
- As you attach the catcher bag, you may need to work close to the mower blade. It is recommended that you wear gloves to protect your hands from accidental cuts. You should also ensure you disconnect the spark plug cable from the engine to prevent any accidental combustion while working.
- Lawnmowers come in different make and brands. The bolts or hinges, or clamps might be located in different areas, and might not be the same universally. To be sure of where to attach your catcher bag, you might have to go through your user manual before proceeding.
- You will need to ready some tools, such as screwdrivers, wrenches, perhaps some pair of pliers in advance.
- Attaching a catcher bag to your lawnmower might take between 15 to 45 minutes, depending on your DIY skills and how well you can operate a lawnmower.
Below, we explain how to attach a bag to a lawnmower in detailed steps. There are different types of grass catcher bags specifically designed for this purpose.
It is more common to attach a bag to the back of the mower, so let’s start from there.
Steps to attach a grass catcher bag to a lawnmower.
- Remove the spark plug from your mower and remove the mulching plate – You may simply disconnect the spark plug cable so as to prevent any accident while you work. Then raise the back door of the mower and remove the mulching plate. Keep this somewhere safe so that when you wish to stop using a bag on your lawnmower, you can return it to its position.
- Find the hanger where you can place the bag – At the back of the mower, look for hooks or bolts, or hinges. This is where you can hang the catcher bag. Clean the clamps or hooks, or hinges so that you can place your bag on a clean hanger.
- Set up your catcher bag – Most grass catcher bags come unassembled, its different components arranged in the pack. You would usually have to set up the bag by coupling the parts together before attaching it to your lawnmower. Follow the instructions that come with the bag to fit the pieces together. The soft part would be the bag, and the harder components should make up the frame and bottom that would house the bag.
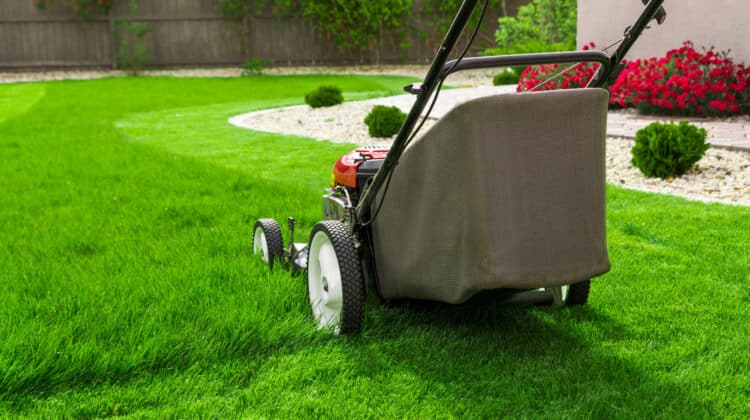
- Attach the bag to the back of the lawnmower – Open the cover at the back of the lawnmower. Attach the catcher bag using the bolts or hooks, or clamps, let the bag hang nicely. Then close the cover. This should hold the bag in place so it does not fall off while moving the lawnmower.
- Do a test – Return your mower spark plug and turn on the ignition switch. Mow a few rows of grass to see if the bag is properly seated, and is collecting the grass clippings as you intend. The clipping should go into the catcher bag if properly installed.
How to attach a bag to the side of your lawnmower
- Shut off the engine and remove the spark plug – You can remove the spark plug cable from the engine to prevent any mishap while working. By the side of the mower, there is a small plastic covering. This is the discharge area. Remove this covering and detach the mulching plate. Keep the plate in a safe place in case you would like to use it later.
- Locate the hanger for your catcher bag – You should find some bolts or hinges, or clamps by the side of the lawnmower. You can attach a tube to the discharge area using bolts or screws. Clean the bolts or clamps to make sure the tube and catcher bag can sit well on this side.
- Install the tube or chute – You will need to install a tube or chute or something similar to the catcher bag through which the grass and dirt can pass into the bag. You should install it on the side discharge door of your lawnmower. Ensure it is tightly fixed and firm by the side.
- Put your catcher bag together – The side grass catcher bag is a little different. The frame usually goes inside the bag, and this can be joined with some hooks that come inside the manufacturer’s pack. Make sure the bottom of the bag is hard. This shows you have rightly assembled the bag. The bag’s handle should be facing up and outside once you are done.
- Attach the catcher bag to the side of the lawnmower – Place the bag on the hanger by the side of the lawnmower. The hanger is attached to the mower’s handle. Remember that the tube should link directly into the catcher bag’s opening because the dirt is meant to pass through it into the bag. You can secure this with hooks.
- Testing sparkplug timing – Reconnect your spark plug to your lawnmower and turn on the ignition. Then cut a few leaves of grass and see how the bag catches the clippings.
Benefits of attaching a grass catcher bag to a lawnmower.
No matter the type of lawnmower you use, a catcher bag can provide several benefits such as:
- Neat mowing – A catcher bag will leave your lawn looking neat after mowing. You don’t have to clean the dirt and clippings after mowing the lawn. The catcher bag will collect the clippings as you mow the lawn so that your grass looks smooth and gorgeous when you finish.
- Use stored grass clippings for gardening – The bag helps you properly store the clipping for later use. Grass clippings are convenient and practical to make compost for gardening, and the bag holds the clippings for when you are ready to use them.
- Prevent the spread of fungus on the lawn – Grass clippings and debris can cause fungus to spread and weeds to develop on your lawn. The catcher bag helps prevent this by collecting the dirt and clippings before this can get the chance to occur.
It takes too much work and time to have to clean up the dirt after mowing your lawn. But with a catcher bag attached to the rear or the side of your lawnmower, you can save time and effort. Yet your lawn will look clean, smooth, and green once you finish mowing.
To attach a bag to your lawnmower is not so complicated. You can do this without the help of a professional with the step-by-step guide above. Once the bag is attached to your lawnmower, you can enjoy stress-free mowing.
