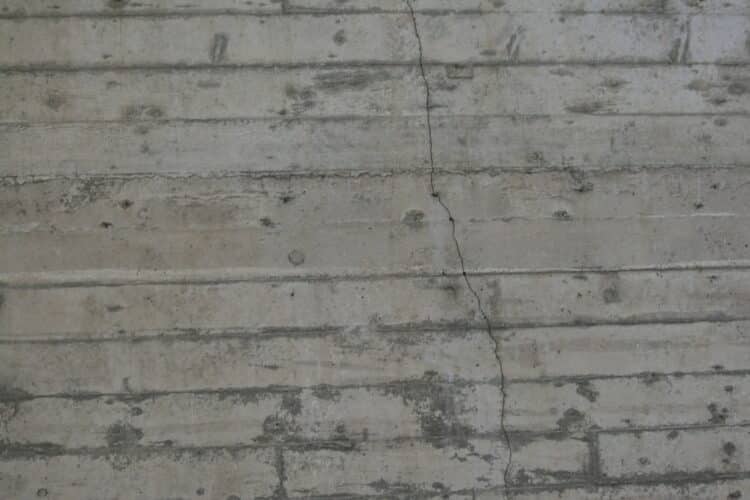
The thing about concrete is that it’s going to crack someday. So why not control the areas it could crack? You can do this by adequately spacing and controlling the depths of control joints in concrete.
But how can you achieve this? And what is its purpose? Read on to find out more
Table of Contents
Why do you need control joints in concrete?
Before you answer this question, you need to answer; what causes concrete to crack? There are a couple of reasons why your concrete surface will crack.
The first reason is concrete can move – it expands and shrinks. While moving, it forms a restraint effect. That means that the concrete slab cannot expand or shrink freely.
It’s either tied to itself or another structure. And since concrete is not ductile, tensile forces make it crack.
Secondly, it shrinks while curing by at least half an inch for every 100 feet. That can cause it to pull apart and, in turn causing a hairline crack.
Thirdly, if you use a lot more water in the placing process, you increase the chances of cracking your concrete. That is because it shrinks more.
Although many people assume that control joints can prevent concrete from cracking, that is simply untrue.
When you put control joints in concrete slabs, you control how it’s going to crack. That’s because control joints create a weak point for this to happen.
Additionally, joints can allow a concrete slab to move freely, independent of other structures.
Plus, joints work at preventing internal restraints allowing concrete to shrink.
This type of restraint occurs when a part of the concrete slab has high shrinkage while the other has low.
How to cut control joints in concrete
When cutting control joints, you need to consider a couple of crucial specifications. For instance, you need to get the depth right, timing, and the location of the cut. If you get one wrong, it messes with the whole process.
Firstly, you need to carefully calculate and mark (use a chalk line) the place you want to place the control joints. Additionally, you need to ensure that the cuts are all in a straight line and the segments have an equal size.
Secondly, while making the joints, you should use a machine instead of doing it manually. For instance, you can use a water cutting machine to complete the task. While at it, you need to see to it that the water is running down the blade.
You also need to set the blade depth of the equipment to match that of the control joints. Also, while saw cutting, you should follow the chalk line drawn on the concrete slab. But it doesn’t end there.
You need to clean the saw cuts and use filler materials to fill the cuts. That will prevent the steel reinforcement from corroding and offer protection from a watertight joint.
When should you cut control joints?
The perfect timing heavily relies on several factors. For instance, you need to consider the weather, concrete mix, how hard the concrete is, the kind of machine you will use to make joints, among others.
If you cut the concrete slab before its time to do so, you risk causing a raveling effect. It’s whereby you scatter the aggregate out of the slab. The result is a weak and messy edge along the joint.
However, if you cut it too late, the concrete will crack uncontrolled when it starts shrinking during the curing process. It would be best if you made sure that the timing is neither too soon nor too late.
The best way for you to know whether it’s time to cut the slab is to make trial cuts and check out for raveling. Once raveling stops, you can start saw cutting.
If the weather is hot, you can cut control joints four hours after you pour the concrete. But if it’s cold weather, you can cut concrete joints twelve hours after pouring the concrete.
How deep should you cut control joints?
Besides cutting too fast, people often make the mistake of not cutting deep enough. That can lead to uncontrolled cracking.
Like the timing, you need to know the right depth to cut the joints to prevent the same outcome.
For instance, if you use a concrete saw to cut the joints, always ensure that you only cut a third or a fourth slab thickness.
If you cut too deep, there won’t be sufficient aggregate interlocking to transfer loads. And if the cut is too shallow, your concrete will crack randomly.
Where should you place the control joints?
For a better and more desirable outcome, you need to place the joints in the middle of the concrete slab. That way, you will be dividing the concrete into equal sections.
Here are some of the factors that can help you determine where to place the control joints:
- Ensure the joints are continuous
- Concrete sets faster in hot climates; therefore, the segments are bigger than conventional ones
- The cuts must make square patterns for all the segments
- The perfect location for the joints is somewhere with little to no steel reinforcement.
Since you also need to get the spacing correctly, ensure that it’s in the range of 24 to 36 times the thickness of the slab.
However, if the concrete you are using is high shrinkage, ensure that the spacing is lower than the typical cut spacing.
Different types of concrete joints
When cutting joints in concrete slabs, there are three distinct types that you can consider:
- Control joints/contraction joints
- Construction joints
- Expansion joints/isolation joints
Tips for cutting control joints
Here are some of the tips you need to keep in mind while cutting control joints:
- Ensure you wear protective gear and take necessary safety precautions
- Always ensure that the blades you use have soft metal segment bonds if you are using heaving rebar
- Twisting the saw blade is not a good idea
- Avoid remnant corners by planning the pattern before cutting
- It’s always good to place the joints in less noticeable areas like under carpets and walls
- Always use saw cutting for cutting hardened concrete to prevent the edges from chipping easily
- Use groover tools for cutting through fresh concrete
- Ensure you do not increase the wear on the bond by not spinning the blade in the cut
- Ensure you cut depths are 25 percent the concrete slab thickness- calculate if you are unsure
How long should I wait to cut control joints after pouring?
If you are in hot climatic areas, you only need to wait for a maximum of four hours before you start making the cuts. However, if you live in colder climates, a maximum of 12 hours is necessary to pass before you make the cuts.
How much spacing should I make in control joints
While spacing joints, you need to make sure the distance is at least two to three times the concrete slab thickness.
Where can you find control joints in concrete
Control joints are pretty common. However, they are more common in some areas more than others.
You can find these types of joints in house slabs, driveways, garage surfaces, basement floors, patios, and sidewalks.
Should you hire a contractor to cut control joints for you?
Yes. Cutting control joints requires expertise, knowledge, and experience that you may not have.
It’s best to let a professional handle the cutting, spacing, and other factors.
In most instances, the contractor can avoid mistakes that you would have otherwise made unknowingly. For example, it’s easy to get the timing wrong, and you can either cut the slabs
too late or too fast.
Either way, you will make the aggregate weak and messy as well as cause random cracking. All these are outcomes that you can avoid easily by hiring a contractor for the job.
However, if you do not have enough funds to cover the cost, you may do it alone. But make sure you follow all the right steps while keeping the tips in mind. That way, you can be sure you did a terrific job.
Is it expensive to cut control joints
No. When you hire a construction pro to handle the cutting and filling, the cost is minimal, but it varies depending on various factors.
You can expect to pay an average of $2 per linear foot to fill control joints.
Final thoughts
Cutting control joints is an essential part of maintaining your concrete slab. The last thing you want is an excessively cracked concrete surface beyond repair.
That is not only costly but can also decrease the curb appeal of your property. Although control joints do not entirely prevent cracks, it makes cracking more controlled rather than random.
With this guide, you can quickly and effectively create control joints while keeping in mind various factors that affect this process. Use these tips when cutting your concrete slabs.


