Basically, X-ray welding is an experimental welding procedure that generates the thermal energy needed to seal materials by using a powerful X-ray source. This procedure used in this type of welding is quite similar to that used in laser beam welding and electron beam welding.
X-ray welding is one of the newest advances in welding technology. In this type of welding, thermal heat essential for the weld is generated using a concentrated high-powered X-ray beam.
The dynamic beam will launch a localized melting of the metal and this will form the weld once it cools off. Just like electron beam welding or laser beam welding, this procedure strengthens stability and is remarkably fast. It also increases the accuracy of the beam to a large extent as a result of the high focus of the beam.
However, an observed drawback is the fact that in a case where the energy generated is not enough for the beam to generate the metal, it goes on to form a molten pool of the metal right on the surface. The solution to this in most cases is to create a keyhole in the joint that will enable the heat to pass through the metal.
The amount of energy that the metal will absorb depends on the thickness and the metal’s density. For a long time, sources of x-rays that can generate such intensity to create an adequate volume of heat used for welding were not available. However, the development of third-generation synchrotron radiation sources has made this possible. Producing the power needed for localized melting and vaporization of various materials has also become achievable.
In time past, x-ray welding was used in quality control, although this is unrelated to its current usage. At the time, most manufacturing and production companies required that welding works by welders have to pass an x-ray inspection. It was used to detect faults like slag, concavities, cracks, lack of fusion and penetration, cold laps, tungsten inclusions, and porosity.
Table of Contents
How are x-rays used to detect faults in welds?
The thickness of a material and the density of the metal will determine how much x-rays can pass through. When the material is too thick, there will be fewer x-rays passing through it. Where there is a crack or defect, there will be more rays passing through and the material will be thinner in those places.
Consequently, the detector forms a picture from the x-rays that penetrate the material, which shows the cracks and flaws.
Are results accurate and reproducible?
In any testing methodology, accuracy and correctness are not just important for are also a requirement. Accuracy is the proximity of the test results to the true value, while precision refers to how the results are reproducible and converge to a certain value.
To avoid errors, it is important to use regularly calibrated instruments for the testing process. The instruments should be calibrated to a known standard in order for them to produce correct results.
How does radiographic testing work?
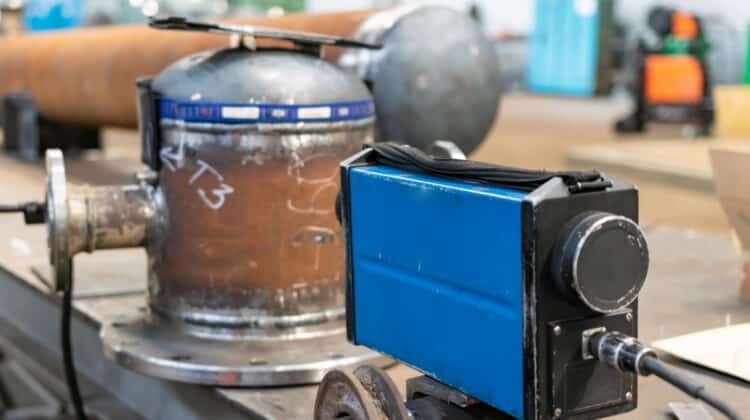
In this approach to weld testing, X-rays are used. These X-rays or gamma rays are produced by a radioactive isotope.
The method used in the radiographic inspection of welds is similar to that of the medical field. Radiation with high penetrating power is passed through a solid object. In the case of medical radiology, the solid object is the human body, whereas in weld testing, the object is the ‘weld’.
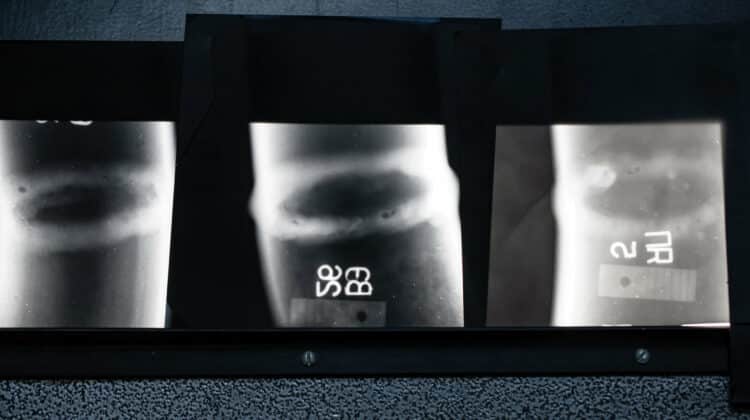
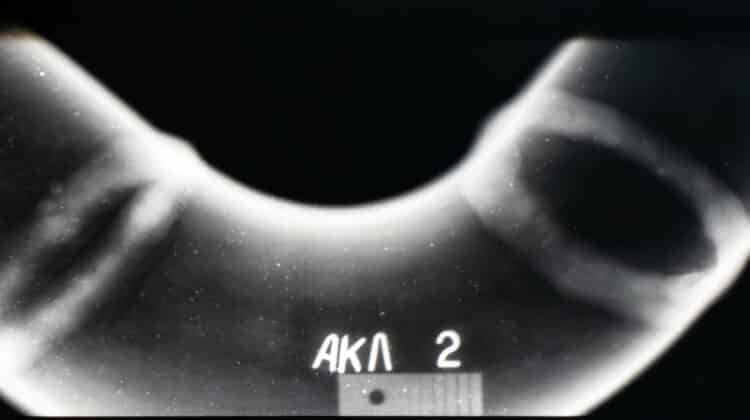
The radiation is passed through the weldment onto a photographic film, creating an image of the internal structure of the weld deposited on the film.
As mentioned earlier, the thickness and density of the object determine how much energy it will absorb. The unabsorbed energy will result in the exposure of the X-ray film.
The darker outlines in the film/image show thinner parts of the weldment dues to discontinuities such as cracking or porosity which is a common welding mistake. Lighter outlines of the image reflect high-density inclusions like tungsten.
Trained radiographic interpreters can read the films and recognize these weld discontinuities by the shape and disparities of darker and lighter outlines in the test results. They are able to do this because the testing can provide a permanent film record of weld quality.
For this testing method, it is ideal to have access to both sides of the welded joint. The only exception should be in the double-wall signal image approach used on certain pipework. While radiographic testing is regarded as a slow and costly method of non-destructive testing, it is one of the best ways of detecting cracks, porosity, inclusions, and gaps on the inside of a weld.
To avoid false interpretation, it is advisable that only trained personnel should interpret the resulting X-ray images. Any alteration in the interpretation can interfere greatly with production, and conducting X-ray testing can be quite expensive. It is also important that only trained personnel do this because of the health and safety risks of viewing X-rays.
What does NDT mean?
NDT means non-destructive testing and it is a testing and analysis method that examines the properties of the material, components, or structure of a weld for weld defects, discontinuities, inclusions, and characteristic disparities without permanently damaging their original properties. NDT is a general term used to refer to non-destructive examination (NDE), non-destructive inspection methods (NDI), non-destructive evaluation (NDE), and even inspection tools.
Welds carry out tests by both destructive and non-destructive methods. However, NDT is one of the most popular techniques used in production tests.
Some of the most common non-destructive tests used to examine welds include radiology, liquid penetrant testing, ultrasonic testing, Leak testing, Eddy Current NDT, Acoustic emission NDT, visual inspection, and magnetic particle testing.
The most obvious advantage of non-destructive testing is that the material component or weld is not damaged or altered by the process. This implies that even when a defect or discontinuity is detected, items can be repaired rather than replaced.
It is a safe way of testing and most of its techniques do not pose risks to the operators or humans in general. This of course excludes X-ray testing, which has to be conducted under strict safety conditions.
NDT helps to prevent injury and fatalities by certifying that materials, components, structures, and machinery are all safe for use.
Advantages of X-ray welding
One of the most important advantages of X-ray testing is that it provides a clear view of the internal composition of materials, structures, or welds. It is a positive method to expose surface and subsurface defects such as cracks, voids, porosity, and inclusions on the internal structure of the weldment.
It also uncovers the size and shape of the defect inside the weldment, making it a lot easier to determine the nature of the defect. Using resulting images from X-ray testing, it is possible to measure the dimensions and angles within the material or weld without sectioning.
Minor changes in the thickness of the weld, density of the material, corrosion, and other flaws can as well be detected. The X-ray film can also be preserved for a long time and used for multi-party research.
Disadvantages of X-ray welding
The major disadvantage of X-ray testing is the health and safety risks it poses. This is why it should be conducted by a trained and qualified radiographic interpreter to avoid eventualities.
Also, it is important for it to be carried out by trained personnel because false interpretation can interfere with overall productivity.
It is also quite expensive to conduct and this is also a great disadvantage. If there happens to be an alteration, conducting another one is not cost-effective.
Where is radiographic testing used?
Radiographic testing is used to inspect welds in various industries such as aerospace, offshore, marine, waste management, automotive, packaging, manufacturing, medical devices, transportation, petrochemical, marine, and others. It is a method of non-destructive testing used largely in welding as welding is also a very common fabrication method used in manufacturing and construction companies.
Radiographic testing is used in weld inspection. Without adequate inspection, there can be welding failures. This is why X-ray inspection is important as it helps to ensure the weldment meets all standards and requirements.


