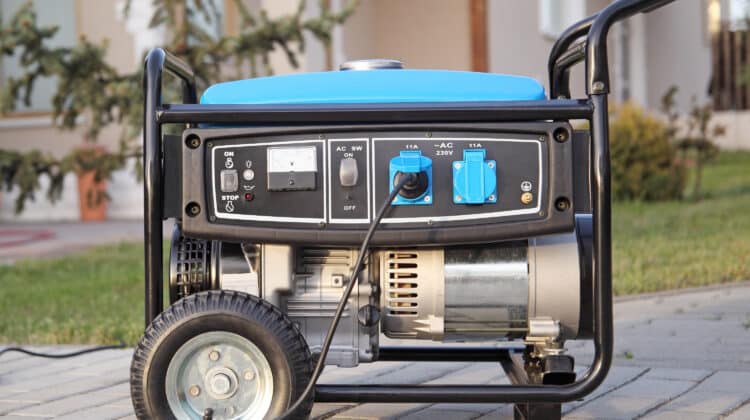
More and more people all over the world are exploring the benefits of being self-sufficient. It is a proven way to save money. Others do it as a hobby, and it may even become a secondary source of income. Whatever your reason for dabbling with DIY projects, we want to help you reach your goals. In this project, you will learn how to build a generator to power a home.
Although it may sound complex, the best part of this DIY project is that you do not need to be an electrical engineer to be successful at building one.
Table of Contents
Why You Should Build A Generator
The list of reasons for building yourself a generator is a long one. But at the top has to be saving money.
Dependence on the national grid is costly. It can also be unreliable at times. But, if you decide to buy a generator to curb your dependence on the grid and save a few dollars, you will spend a small fortune before ripping the benefits.
You will need to buy your equipment and pay to have it set up. You must get training to use the system, and if it breaks down, you have to pay to have it repaired.
The next best thing is building your power generator yourself.
What You Need To Know About How To Build A Generator To Power A Home
Electric generators of all kinds follow the same general rules. The power to generate electricity comes from somewhere else. The basic principle is to take one form of energy and change it into another form of energy.
That means, wherever you plan to install your homebuilt generator, it needs a line to a constant source of energy to convert to electricity.
How To Transform Energy To Battery-Powered Electricity
That’s what your homebuilt generator will do. It will change one form of energy into electricity and store the electricity it creates in a vessel or battery.
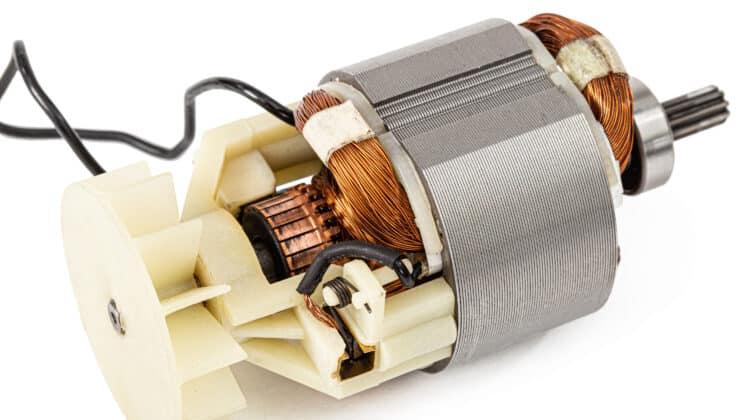
There are several DIY generator models from which you can choose. But no matter which model you design, two pieces of equipment will do the energy conversion. Without these parts, your generator will not work. These parts are the rotor and the stator.
The stator acts as a home for the rotor, but it serves a deeper function than that. The rotor sits inside the stator and spins. Within the rotor are several magnets. These magnets generate electricity with each turn of the rotor.
Coils inside the stator harness the electric current the spinning rotor creates and transfer it to a storage vessel. The storage vessel is a battery. The larger your battery, the more energy you will store.
Now it’s time to learn how to build a generator to power a home.
Items You Need To Build A Generator
Every DIY project needs supplies. So, your first order of business is to have the right equipment.
You Will Need:
- An engine (gasoline-powered)
You can use any engine to produce electricity. But how much energy you generate depends on the engine size. If you have a large enough engine, you can build a generator that creates enough electricity to power your house.
Lawnmower generators are an ideal size. They fall within a five to ten horsepower range, which is practical for powering average-sized homes. - Gasoline tank
- AC generator head
The AC generator head will be the magnet that creates electricity every time the rotor spins. The generator head and the engine size need to be compatible. - 12 volt DC alternator
Your alternator will produce 12 volts direct current. But, it also must have a voltage regulator built into it. - Pulleys
- Drive belts
- Shaft couplings (direct drive) (pulleys)
- Wires
What Are The Components Of A Home Built Generator
- Frame
- Bearings
- Rotating shaft
- Field windings
- Stator
- Armature
- Commutator
- Brush assembly
Steps To Follow To Build Your DIY Home Generator
- Build the mounting plate
Your generator will need legs to support it. Choose a material that can withstand the vibrations given off by gas-powered generators to build your foundation. - Connect the pieces that generate power
Your next step is installing your power generating pieces on the base/mounting plate of your system. These are the generator head, engine, and alternator.
The mounting holes and patterns for your power pieces must follow the instructions given by the manufacturer.
Install these pieces with their shafts in parallel positions. Also, ensure the drive pulleys attachment shafts are placed the same way. - Install the pulleys
Mount one pulley to your engine shaft. That pulley will belt drive the other pulleys already in your alternator and generator head so it must be the correct size. That way, when the engine rotates at its nominal pace, the belts will scale this higher or lower to the alternator and generator head pulleys.
Ensure that your scaling is the same as what the manufacturer of your equipment recommends. - Run the belt/belts
Your generator’s design may need many pulleys to apply the right shaft speed to the alternator and generator head. Or, you may only need one engine pulley and one belt.
Either way, ensure the belt running over the pulleys is taut. The V belt type of pulley has a better grip. It will remain in place. - Install a gas tank
The gas tank mounts onto the base of your generator like all the other parts. - Fill the tank with tank
Filling the tank is the last step in your homebuilt generator. Once you’ve done that, you are ready to make the necessary connections to power your home.
Final Thoughts
Learning how to build a generator to power a home is an easy five step process that will improve your journey to being self-sufficient.
