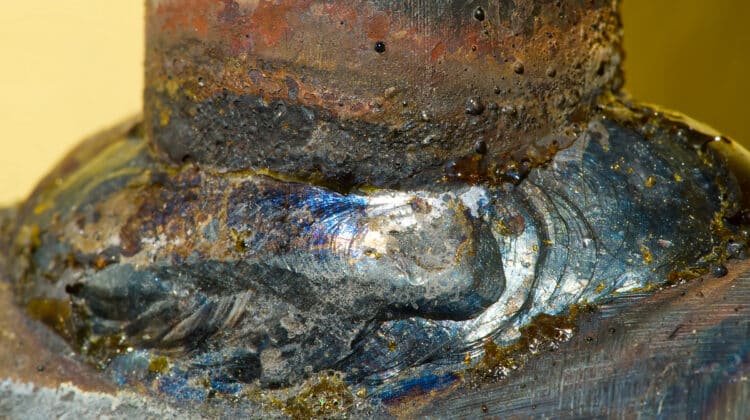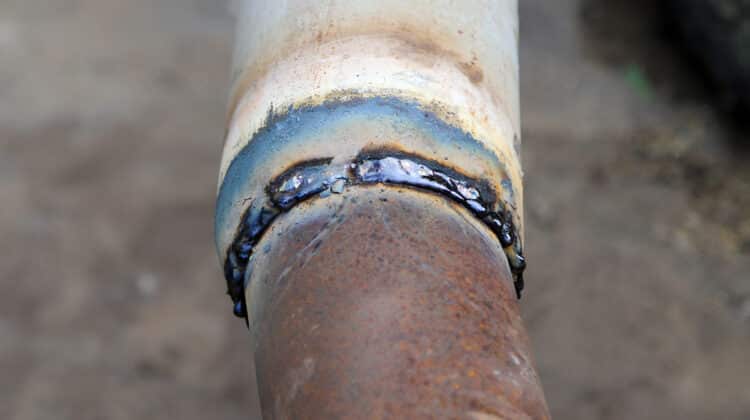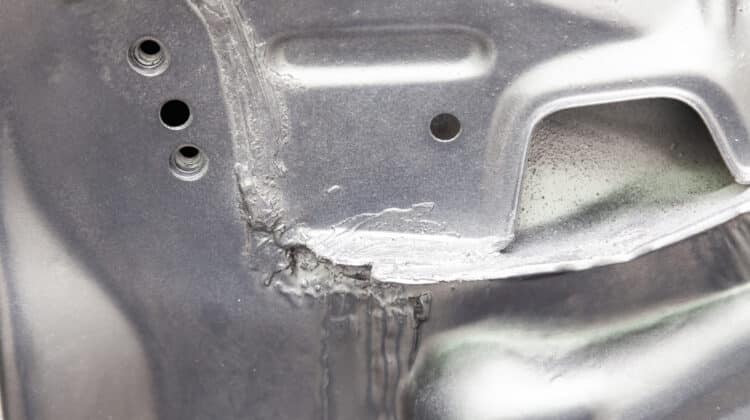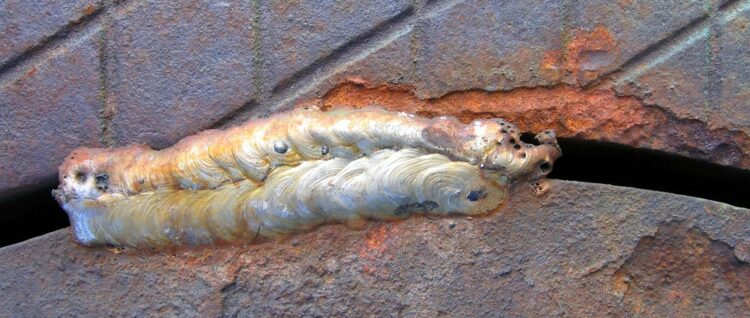
Welding defects refer to any barrier that hinders the functionality of the weldment. There are varieties of welding defects and are grouped according to ISO5817.
Engineers recognize the existence of imperfection and are used to working with tolerance. The degree of acceptance before defect refers to tolerance. Therefore when defining tolerance, the application, process, and material used should have significance.
Imperfections refer to the differences found in the project regarding the structure. Some of them are inevitable though you should treat them as unacceptable.
Table of Contents
Welding defects classification
They are classified into two categories:
- External welding defects – these are the welding defects that occur on the upper surface of the welded work.
- Internal welding defects – this type of welding defects occur under the surface of the welded work.
The internal welding defects are later classified into:
- incomplete fusion
- cracks
- lack of fusion
- inclusions
- blowholes and internal porosity
External welding defects are classified into the following categories:
- distortion (not welded properly)
- cracks
- incomplete filled groove
- spatter and surface porosity
- incorrect profile
- cracks
Common types of welding defects
Below are some of the welding defects that you are likely to come across.
Incomplete fusion
The type of welding defect occurs when the bead fails to fuse properly. One of the most common types of incomplete fusion refers to overlap. It happens at the toe of the welding surface. Holding an electrode or filler rod at the wrong angle while making the weld may lead to a manufacturing defect. The type of welding defects can also appear between adjoining weld beads. Therefore creating a gap in the joint cannot be filled by molten metal.
Causes of incomplete fusion
- Surface contamination
- Holding electrode incorrectly
- High travel speed
- Large weld pool running ahead of the arc
- Incorrect electrode diameter
- Low heat input
Remedies of incomplete fusion
- Reducing the rate of deposition
- Using correct electrode angle and diameter
- Preventing molten pool from flooding the arc
- Thoroughly cleaning the metal before welding
- Using high welding current with perfect arc voltage
Porosity and blowhole
Porosity refers to tiny bubbles, and blowholes are large hidden pores. Most of them are as a result of trapped gases. Also eeld metal contamination may cause porosity.
Causes of porosity
- Using large gas flow
- Existence of moisture in the process
- Using large arc
- Wrong gas arc
- Untidy job surface
- Insufficient electrode dioxide
Remedies of porosity
- Ensuring gas flow meter has adapted as required with appropriate pressure and flow setting.
- Ensuring cleanness before beginning the welding process
- Making sure the arc distance is correct
- Selecting the best electrode and filler materials
- Preventing pollution from entering the weld zone by cleaning
- Decreasing welding speed
Weld cracks
It is classified as the most dangerous type of welding defect. Weld cracks occur on the weld metal or in those areas affected by solid heat. There are various types of cracks that may emerge during the welding process. The kind of crack occurring may depend on temperature. Below are the types of weld cracks
- Hot cracks – it happens during the crystallization process of the weld joints. The temperature may increase up to 1,000C.
- Cold cracks – cold cracks occur after the weld is created and the temperature of the metal has gone down. They appear hours and days after welding steel. In most cases, the weld emerges when the deformation is made in the structure.
- Crater cracks – this weld crack is different from the others since it occurs at the end of the welding process. It has to be before the operator completes the weld joint. They mostly appear near the end of the process.
Causes of weld crack welding defects
- Contamination in the base metal
- High mixture of carbon and Sulphur in the metal
- Failing to preheat before beginning the welding process
- Improper filling of the crater in the welding
- Shrinkage causing residual stress solidification.
- Poor design concept
- Using hydrogen when welding ferrous metals
- Low current with high welding speed
Remedies of weld crack welding defects
- Using the best design concept
- Picking the best metal
- Preheating the metal before starting the welding process
- Proper cooling of the weld area
- Filling the crater to prevent crater cracks
- Ensuring you have properly mixed Sulphur and carbon
- Using proper welding speed and current
Undercut
Undercut refers to the groove formed when the base of the metal melts away from the weld zone. It has a notch shape. Moreover, undercut welding defect reduces fatigue strength of the joint.
Remedies of undercut welding defects
- Monitoring and reducing the travel speed of the electrode
- Lowering the arc voltage or reducing the length
- Ensuring the diameter of the electrode is small
- Keeping the electrode angle and 30 to 45 degrees ensure that it has a standing leg
Cause if undercut welding defect
- High electrode speed
- High level of arch voltage
- Using wrong electrode or if it is wrongly placed
- Using large electrode
Overlap
This type of welding defect emerges if the weld face goes beyond the weld toe. Therefore the weld metal rolls and forms an angle less than 90 degrees.
Causes of overlap welding defects
- Using high current when welding
- Large electrodes may cause this welding defect
- Applying wrong welding technique.
Remedies of overlap welding defects
- Use small electrode
- Applying less welding current
- Using the best and unique techniques when welding.
Necklace cracking welding defects
In a case where you use electron beam welding, this welding defect may occur. It is mainly when the weld fails to penetrate properly.
Therefore the molten metal wont flow well in the cavity leading to cracking.
Causes of necklace cracking
- Using materials such as nickel-base alloys, stainless steel, carbon steels and tin alloys
- Ensuring high speed of electron beam is applied
- Applying improper welding technique may lead to necklace cracking.
Remedies of necklace cracking
- Choosing the best materials for welding
- Applying constant speed during the welding process
- Using the best and unique welding technique reduces the chances of necklace cracking occurring
Incomplete penetration
This type of welding defect occurs if the groove of the metal is not filled. Therefore the weld metal does not extend through the joint thickness.
Causes of incomplete penetration welding defects
- Large electrode diameter
- Lack of proper alignment
- Wrongly placed joints
- Failing to melt the metal if low current is used
- Large spaces between the metal
- Failing to deposit enough metal in the joints
Remedies of incomplete penetration welding defects
- Ensure proper alignment
- Confirm joint geometry
- Selecting the best welding current
- Choosing suitable electrode size
- Reducing arc travel speed
Spatter
When the tiny particles of the weld attach to the surrounding surface, this type of welding defect is likely to appear. It mainly occurs on the gas metal arc welding. It is hard to avoid altogether the appearance of spatter welding defects.
Causes of spatter welding defects
- Surface contamination
- Using wrong polarity
- Choosing a too wrong arc
- Steep angle of the electrode
- High running amperage
- Low voltage setting
- Erratic wire feeding
Remedies of spatter welding defects
- Ensure the surface is perfectly clean before beginning the welding process
- Avoid long arc
- Controlling the weld current
- Increase the electrode angle
- Using suitable polarity
- Ensure you do not have any feeding issues
Slag inclusion
Slags refer to the waste materials produced during the welding process. It may damage the quality weld. Besides, there are those tiny solid materials that may incorporate the weld. Flux rust forms slag and may lead to contamination in your slag.
Common causes of slag inclusion
- Failure to perfectly clean the welding pass before applying for the next pass.
- Using incorrect welding angle
- Use of low amperage
- Existence of slag running ahead of the weld puddle when welding a v-shaped bead
- Existence of flux from the stick of the welding electrode that may come off and end up in the weld.
Remedies of slag inclusion
- Reducing rapid cooling
- Increasing current density
- Boosting the welding speed
- Adjust the electrode angle
- Eliminating any slag from the previous bead
Weld Flaws
A weld flaw refers to any indication on a weld that may affect the quality of the weld. The location, type, and size may affect the acceptance of the weld flaw. Welds have features of or discontinuity. If the discontinuity goes beyond the relevant acceptance standards, it turns out to a defect.
Common difference between weld discontinuities and a defect
A weld discontinuity refers to an interruption in the expected flow of structure in a weldment present. It mostly happens in the weld metal or adjacent parent metal. The interruption is found in the mechanical, metallurgical, and physical characteristics of the material. Incorrect welding pattern leads to discontinuities.
Moreover, discontinuity differs from the expected weld bead shape depending on the body, size, and intended quality. They mainly occur either outside or inside the weld metal. However, if the discontinuity is under permissible limits, it may result in rejection. Once they exceed the limit stated, they lead to a weld.
Categories of discontinuity
The classification of discontinuity may depend on the location of the weld. Besides, they can be classified depending on either volumetric or planar according to the shape, size, and orientation.
- Volumetric discontinuity – This discontinuity has three dimensions: width, thickness, and length. Examples of volumetric discontinuity are slag, inclusion, and porosity.
- Planar discontinuity – Unlike volumetric discontinuity, planar has two dimensions. Therefore they lie on one plane. Examples of planar discontinuity are fusion and cracks.
- External discontinuity – This discontinuity can are found on the surface of the weldment.
They can be identified by visual inspection. Additionally, you can use methods such as Dye, Liquid penetration, and magnetic particle inspection. - Internal discontinuity – They are found inside the weldment. Weld defects such as internal cavities and lack of fusion lie under this category. To detect internal discontinuity, one has to utilize methods such as radiography testing and ultrasonic testing.
How to identify welding defects
Your weld should meet the accepted standards. Inspecting the welding defects may help you meet the criteria. In a situation where you notice any of the issue related to the welding defects mentioned in this article, you should try to rectify. To avoid risking the quality of your artistry, you should assess the welding defect.
Welders should always pay close attention to defects that may emerge on the weld. The typical welding defects can be corrected using the required expertise, but identifying the weakness may be challenging.
Nondestructive ways of testing welds
Contaminants and metallurgical defects may emerge during the welding process. The weld should meet the required quality despite its withstanding loading conditions and stresses. You need to identify if the weld is destructive or not using techniques. Below is the list of nondestructive ways of testing welds.
- Visual inspection – Her they keenly look at the weld pool and the cooling metal. Therefore trying to identify undercutting, depth of the penetration, and the possibility of bonding to the parent metal. After identifying a welding defect, they mark the part.
- Magnetic particle inspection – changes in the magnetic field are used to detect welding defects. If there is a defect, the magnetic field is interrupted, and the field distorts the defect. The method is only suitable for metals. During the process, the magnetic field is produced by putting metal prods on each side of the weld, leading to a low current. The external magnetic field induces the magnetic field. After introducing a magnetic field, a few powders and colored metal particles are put on the part. The experienced experts inspect the pattern created by the magnetic field for distortion.
- Ultrasonic inspection – the qualified experts send frequency sound using an emitting probe. The monitoring screen displays the size and location of the welding defect.
However, if the wave finds a welding defect, they bounce it off and return to the probe to detect them.
The method is not suitable for surface and near-surface faults.
At times a dead zone appears below the contact part of the probe .using a liquid coupling agent such as grease aid in ensuring the perfect acoustic connection between the metal surface and the investigation.
A smooth test surface is necessary for the coupling agent to maintain contact between the metal and the probe. The wavelength of the sound determines the size of the defects. As a rule, the defect should be half wavelength for easy detecting.
Eddy current inspection- change in the electric current flow in a coil of electric wire detect the presence of a welding defect.
The electric current flow establishes a magnetic field around the coil. Once the magnetic field comes across the conducting metal, eddy electric currents develop in the metal.
This method is suitable for detecting weld defects deep into the metal. The speed, the metal being tested may determine the possibility of testing depths up to 25m.
It is mostly used when testing steel tanks and floors. The experts send a crawling scanner across the surface and change the eddy current. The monitoring screen shows the occurring changes.
Conclusion
Welding defects such as incomplete penetration and inadequate fusion affect the integration of the welding component. Several methods detect the existence of a welding defect.
