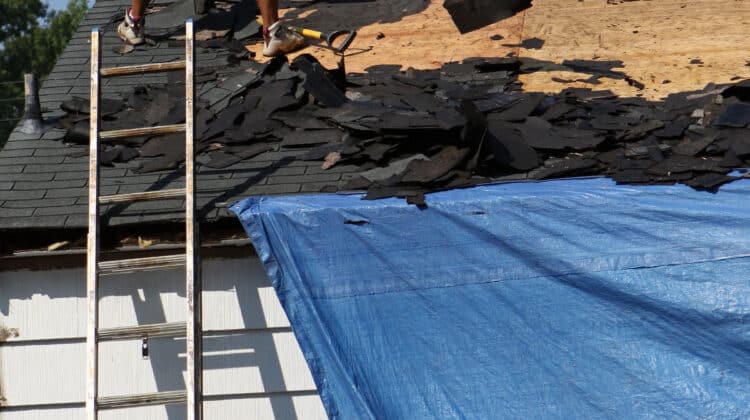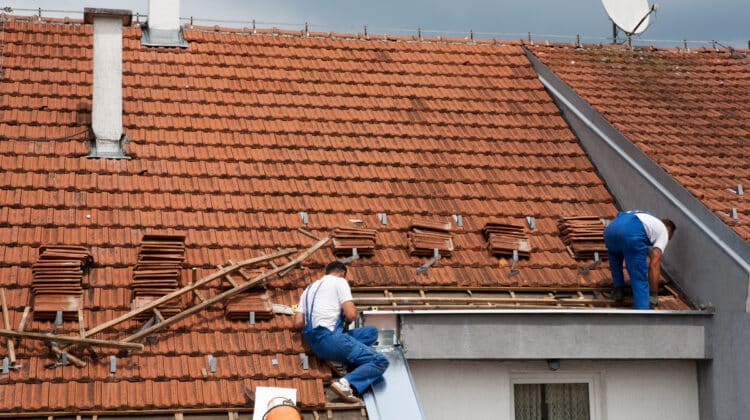
When your ceiling suddenly springs a leak, knowing how to tarp a roof is essential, which can save you and your family, even though it is only a temporary fix.
If you live in an area frequently hit by typhoons and powerful rains, your roof would always be the first casualty. And the first thing you need to do is to repair it. By doing this, it allows you and your family to remain dry and safe from harsh weather. Up until a professional roofer fixes it permanently.
It is the first crucial phase in the rehabilitation process of your home. Since the roof is regarded as the most exposed portion of your house and the one most likely damaged.
You might think that you can ignore it, and maybe the cracks or leaks will go away. However, not doing anything about it will lead to further damage and a higher repair cost in the long run.
Timing is crucial in this situation, and you need to patch up the leak immediately to mitigate the problem. Thus, avoiding any dangers brought on by a damaged roof.
Unfortunately, during this hard times, you might find it difficult to locate professional repairmen to fix it.
So it is up to yourself to repair the leaky ceiling immediately, and the best fix is installing tarp over your roof. And the good news is, it is much easier than you think and working with tarpaulin material is particularly user-friendly.
Table of Contents
What are the tools and materials that you will need to tarp your roof?
- Tarp (woven, top quality poly tarpaulin, the best one is silver tarp
- two by four wooden planks, four to five pieces (or studs)
- Screw gun (or drill)
- Hammer
- Nails, about three and one-fourth inches long or cap nails)
- Utility knife
- Ladder
- Safety goggles
- Hand gloves
- Tape measure
- Optional item: roofing cement
- Optional item: waterproof tape
- Optional item: sheet metal or plywood
What are the safety measures you should follow?
Doing anything on the roof is dangerous and can be potentially lethal, and rolling out tarp on the roof to patch up a leak is like pouring gasoline on fire.
Tarpaulin material can be especially slippery, even when dry. Walking on them can be dangerous if you are not careful.
In the immediate aftermath of a weather catastrophe when professional roofers may not be available, you as a homeowner are responsible to install the tarp on your roof.
So you have to be especially careful and practice safety measures in doing this potentially deadly task and look for ways not to walk on the tarp.
One way is to try to do as much work on the ladder if you can help it. The ladder is an excellent tool to use in this situation and makes your patching task safer and quicker.
To accomplish this, you need to follow ladder safety guidelines first:
- Before choosing the right ladder for this roof patching task, check on the weight rating first.
- Inspect the ladder before utilizing it for any tasks.
- Be sure it is stable and steps are firm before starting to climb it.
- Be sure that you are also stable and not wobbly as your stand or climb on the ladder.
- Avoid carrying numerous items when you are climbing on the ladder.
Also, for added safety, make sure the ladder steps have anti-slip pads. And also, never stand on the top step.
It will be safer if you have someone else to help you in the repair process, like holding the ladder.
Do not try to fix the roof when there are bad weather and strong winds.
Always use rubber sole boots and wear safety harnesses when on top of a slippery and steep roof.
What makes an excellent tarpaulin material?
Selecting a great tarp might be immaterial since it only serves as a temporary fix. And also, you would not have time to be selective when trying to finish the task quickly before another storm arrives.
But if you have enough time to choose a tarp, here are the features you should look for:
- Size- The tarp should stretch out over the damaged spot by three feet on every side, which includes the bottom of the ridge.
- Exterior and interior- You have to be sure you pick a tarp that is meant for outside use.
- Thickness- The tarp should be as thick as possible and will enable patching up to be more effective.
- Ultraviolet protection- Make sure its fabric has UV inhibitors, which will make it last longer under the heat of the sun.
What are the steps in how to tarp a roof?
A tarp is not only an excellent temporary fix on your roof, but you can also install it even without roof leaks as a preventive measure to halt any possible cracks and leakages from happening.
If you secure tarpaulin properly on your roof, it can protect it from new rain or prevent missing shingles to turn into leaks and keep it from becoming worse.
It is not only an excellent safeguarding method to protect your home, but it might also be essential for your home insurance policy.
If you are not doing anything to prevent your home to be damaged by an incoming inclement typhoon, your insurance provider might not cover any damages incurred.
This particular task is best done by a professional roofer. But in the absence of one, you have to tarp the roof yourself and be sure to do it properly.
1. Clean out any debris on top
Before setting up the tarp on the roof, you have to remove any branches and debris on top, especially on the damaged spot that caused the leak.
If the attic is right underneath the leaky spot, examine the entire attic space to find other leaks and watermarks.
2. Examine the affected area
You will need to get a precise picture of the damaged roof so that you will know the length of the tarp required.
If there is a clear cut hole in your roof, you will have to cover it first with one-half-inch plywood or a metal sheet and screw it on tightly before blanketing everything with a tarp. It will keep water from accumulating in the hole after the tarp is properly installed.
Be sure you are wearing the proper safety gear before climbing up the ladder, and make sure you also have a safety harness attached.
You can also use a remote control drone to examine the damage if you are hesitant to go yourself.
3. Take measurements
The size of your tarp will depend on the damaged spot that needs to be repaired. There are many available sizes that you can choose, like twenty to thirty feet durable tarpaulins or twelve to sixteen feet silver ones. But be sure to allow three feet on all sides.
To determine the entire area that needs to be patched up, you need to take measurements. Check for any other damages or lacking shingles and include them in your measurements.
4. Take photos
If you are looking to get reimbursed by your home insurance provider, you will have to take pictures of the damage before you installed the tarp.
You can do this before you have cleared out the debris, except when the debris is covering the affected area and won’t allow you to get a clear picture.
5. Anchoring the tarp
Unroll the tarp and spread it on the affected area, and make sure to weigh it down with two by four planks. One can be made as an anchor that starts from the tarp end closest to the peak of the roof.
If you will cover a portion of the roof’s peak, you could not screw the planks along the ridge. Rather, you can utilize two smaller planks and allow space around the roof’s peak.
Screw the anchor plank below the tarp and straightaway to the surface of the roof with one screw. Then sandwich the tarpaulin between another plank and nail them together.
Roll the extra tarp around the planks to enable them to be watertight. Do the same step along its edges to make sure it is tight and properly sandwiched between the planks.
6. Securing the edges
After all the planks are in their proper positions, screw them in place. Since you allowed at least three feet on each side, there will be an extra tarp hanging on the edges.
Put another plank below the roof’s edge and secure the extra tarp to prevent any liquid from flowing below and keeping it out.
7. Contact professionals
When all else fails and you could not properly tarp the roof yourself, your last resort is to call the professionals.
Temporarily putting the tarp on your roof will give it protection from harsh weather for ninety days. Doing this task needs all the necessary tools and equipment to make the fix successful. And if you don’t have them, then it is best left to professionals to do the job.
Roofing is a delicate task, and even professionals can damage the tiled roof or shingles by accidentally stepping on a weak surface. Amateurs can cause as much harm, and if they do more damage, their home insurance policies won’t likely cover it.
How can you tarp your roof without using nails or screws?
Using nails or screws to fasten the tarp on your roof has an added danger and difficulty to the task, more so if you are doing it for the first time. Without any professional roofer doing the job for you, it will be a tricky process.
However, if you will be using a self-adhesive tarp, the procedure will not be as hard and can be done quickly. With another friend it tow, you will be able to tarp your roof in due course.
Tools and materials needed
- Self-adhesive tarp (measurements based on roof damage)
- Measuring tape
- Ladder
- Heat gun
- Extension cord (to attach to heat gun)
- Sandbags
Here are the steps on how to tarp your roof without nails or screws:
- The recent storm has passed and partially damaged your roof, so it is up to you to temporarily patch it up. Be sure the weather has cleared up so you can climb up the roof to place the adhesive tarp.
- Situate the ladder on a level surface and climb towards the damaged spot. Be sure to secure yourself properly to the roof harness.
- Clean out the debris surrounding the roof.
- Examine the affected area to see how serious the damage is.
- Take measurements on the area and make sure there is at least three feet allowance on each side to make sure there is adequate coverage.
- Pre-select an adhesive tarp that fits your measurements, with an overlap of three feet on all sides. Check on its packaging if the kind of adhesive will stick to the type of shingles on your roof.
- Make sure the roof is dry since the adhesive would not stick on a wet surface. If it is wet, you can dry the area for attachment with a heat gun.
- With the help of your friend, spread the tarp from the roof peak towards the affected area and make sure it is smoothly laid out flat on the roof.
- Fasten the edges of the tarp with the self-adhesive.
- Take the sandbags and situate them on the edges of the tarp to make it more secure.
- The narrow portion of the sandbag should be facing either upward or downward from the slope of the roof. This way, it would remain steady and not fall over.
It is only temporary work. Your roof will still need to be fixed permanently by a professional roofer. The tarp will remain steady for ninety days, so make sure the bad weather has passed and get it repaired.
Conclusion
This article teaches you how to install a tarp on your roof to cover up leaks, either using nails, screws or without them.
As mentioned, the tarp can be exposed to weather elements like the sun, rain, and wind for ninety days only. Over that, the tarp will slowly degrade and lose its effectiveness.
However, there is another thing that needs to be stressed more: they are only temporary repairs. Once the weather has cleared up and professional roofers or contractors have become available, contact them immediately for your roof to be repaired permanently.


