Few people give regard to how appliances work. We spend money on them, and so long as they do the job well, we are happy. But then the day comes when our appliance ceases to function. It makes a funny noise, or does not behave the way it should. When that happens, we begin to worry and scramble to diagnose the problem. Each component of the appliances we own, no matter how minor, has a vital role to perform. Today’s article focuses on the thermopile, a little-known instrument. We want to discuss what it means when you see the warning about water heaters thermopile voltage low on your water heater means. We also want to help you learn what you can do about it.
A regular joe may have no clue what a thermopile is. But without this part in working condition, you will not have any hot water. A key question you need to ask: is your Thermopile Voltage Low?
Table of Contents
What Is A Thermopile?
A thermopile is a device in your water heater made up of a collection of thermocouples. The thermocouples connect in parallel or series arrangements.
What Does A Thermopile Do?
The job of a thermopile is to detect temperature without using any contact. It changes thermal power given by an object into voltage output or electrical power. There can be tens or sometimes hundreds of millivolts.
In simpler terms, the thermopile is a kind of heat sensor, but it also generates heat. They do this using their parallel or series arrangement of thermocouples.
The thermopile in your gas water heater interprets flame loss or failure. Your water heater has a pilot light. That pilot light is a small flame that gas ignites whenever you turn on your water heater.
When the pilot light is aflame, it heats the thermopile. The thermopile generator then releases voltage. As soon as the pilot goes out, there will be a drop in the voltage. That drop in voltage triggers a valve that shuts off the gas line to the water heater. That gas line will remain closed until the pilot light ignites again.
For a small device, the thermopile has a pretty important job.
What Does The Alert Water Heaters Thermopile Voltage Low mean?
Make a note of what happens when you turn on your pilot light. Does it go out a few seconds or minutes later? If that happens, then your thermopile could be the cause of the problem. If that is the case, you will most probably see the error thermopile voltage low.
The manual that came with your water heater will have information on the thermopile. It will also tell you the range of millivolts your water heater thermopile has.
Usually, that number falls in the 650 range to 850 range. The error thermopile voltage low means the voltage of the thermopile dropped well below that number. It means the voltage dropped too low. When you want to use your water heater, the gas line remains closed.
How To Test Water Heater Thermopile For Low Voltage
When you see this error, water heater thermopile voltage low, your first reaction will probably be to call someone. You might think to contact the manufacturer or the store where you bought it. You might not get a timely response, or there might be a lot of red tape hindering the process. And it is all so frustrating.
What can you do if your water heater gives a water heaters thermopile voltage low warning?
Your first order of business is running a test.
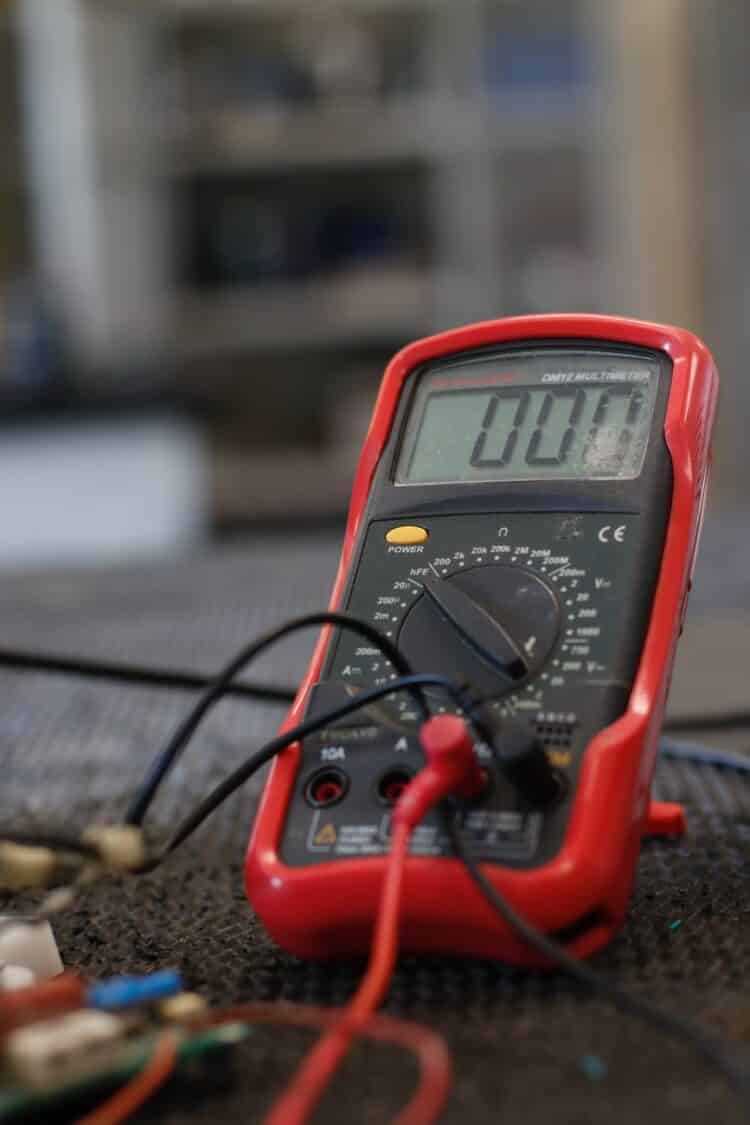
There are two methods for testing the thermopile, and you can do them both yourself. Do not be alarmed. The process is quite straightforward. Once you have the correct tools, you can run this test in a short period of time. You do not need any experience working with water heaters beyond turning it on. The only thing you need to get started is a multimeter with the capability of reading millivolts.
Here is how you do this.
Complete Thermopile Test One (Close Circuit)
- Set your multimeter to the direct current option
After you have done this, change the range to millivolts or under one volt. - Disconnect the wire connecting the water heater to the water heater’s gas control
You may find that you have to wiggle it a bit to make the disconnection. But that is quite alright. - Connect your multimeter to the thermopile
The positive lead on the multimeter has to connect to the positive part of the thermopile. The negative lead has to connect to the negative part of the thermopile. The positives should be red on both the thermopile and the multimeter. The multimeter has a black negative wire. It should connect with the white negative part of the thermopile. - Disconnect the wire connecting the thermopile to the water heater’s gas control
Turn your gas control, so it is on pilot lighting. Ignite it according to the direction in the manual that came with your water heater. Follow these instructions exactly. Different manufacturers can have different modes of operation. You can also find variations in the different models of the same item. The way one works might not be the way yours works.
Once you’ve followed this step, you will see the needle on the multimeter start climbing. This shows a rise in the voltage. - Hold down the thermostat knob on your water heater’s gas control
The multimeter needle will record the thermopile’s maximum voltage. You will know when it gets to the max. The needle will stop moving. This part of the test should take around 3 (three) or so minutes. It will let you know the voltage reading of your thermopile.
Remember, the range should fall somewhere around 650 and 850. But this error warning will only appear if the voltage falls below 400. As long as the multimeter reads 400 or higher, your thermocouple should be okay.
Complete Thermopile Test Two (Open Circuit)
- Read and follow the lighting directions on the water heater
If you want more details, you can also check the manual. - Ignite the pilot
Allow for three minutes of operation after completing this step. - Put one lead of your multimeter on either side of the water heater’s wire harness
One lead goes on the right, and the other goes on the left. The needle should start to move. It will stop when it gets to the maximum voltage your thermopile has.
If the multimeter reads a millivoltage range higher than 400, the thermopile is in good shape. Your water heater has another problem you need to diagnose.
If the multimeter reads below the 400 range, then you need to replace the pilot assembly.
How To Replace The Thermopile
Now you know the thermopile voltage low warning on your water heater is correct. What do you do? Again, you can go through the process of contacting the manufacturer. You can fill out all the paperwork =to have the thermopile; or your entire water heater replaced. Or, you can swap out the faulty one for a new one yourself.
Just like running the thermopile voltage test, putting in a new one is just as simple. But it can take a bit of time.
- Turn the gas supply off
The first step is to switch off your water heater’s gas supply. Turn the gas on/off control button to the off setting. To get to the component, remove the protective cover. - Remove the wires from the circuit
The thermopile wires and ignitor must be disconnected at this point. It can take some twisting to get it out. Removing the pilot tube and manifold should be done with caution. The connections strip easily, ensure that you use the right-sized tools to get the job done. During this step, be careful. You do not want to mess up any wires or tubes. - Take off the manifold door
There are two screws that keep the manifold door assembly secure. You have to remove those screws to gain access to the thermopile beyond this door. Once the door opens, be prepared to note where the tubes and wires fit and connect with the manifold door. You need to remember their exact location for when you have to replace the thermopile.
After you get through the door, take the burner assembly out of the chamber. You will now have access to the thermopile. - Remove the thermopile wire and pilot assembly
You will see the manifold door’s retaining clip. Go ahead and remove it. Take off the screw holding the shield and pilot assembly in place. Disconnect the thermal switch’s wiring. After following these steps, it is possible to pull the pilot assembly out by easing it via the manifold. You may need to wiggle it to and fro to get it to come out. - Replace the old thermopile wire with a new one
Uncoil the new wire to connect the thermopile. Thread it into the manifold door. Make sure you seat it fully. Once it is in place, secure the manifold door’s retaining clip back where you found it. All you have to do is click it into position. - Replace the wires via the manifold door
Feed the replacement thermopile wire and pilot tube into the manifold door. Avoid bending the pilot tube while doing this. You might encounter some trouble reconnecting it when you’re ready. - Put in the component block of the manifold
Return the pilot assembly and the shield to their original positions. When you insert the component block, avoid pinching the wires. The component block will slip into place when you feed in via the door. Ensure that each wire’s insulation aligns with that component block. - Reinsert the thermal switch wires
Put the shortest of the wires on the left side. Check to see if the gasket for the manifold door suffered damage. Do not reinstall a damaged gasket. You must replace it. Since you are already working on this part of your water heater, you can take the opportunity to do that. - Replace the manifold door and secure it
There is a burner plate that has a tab at the base. Insert it into its slot on the bracket. You will find this bracket at the base of the chamber for the burner.
You should hear and feel when it connects with the bracket. It should sit there securely. Once you have the burner in place, move it from left to right to ensure that it does not move. If you are able to move the entire burner, it is not sitting the correct way. You must fix this problem. Now, you need to put the manifold door back in place using the screws you removed. - Reconnect the pilot tube and start the gas flow
First, reconnect the pilot tube. After that, do the same with the manifold tube. Put the wiring for the thermopile back into position. Reconnect the wiring for the ignitor. Turn on the gas and set the knob of the thermostat to pilot. Depress the knob. Push the switch that will ignite the flame at the same time. Keep pressing until you see a blue flame. You should not smell any gas. If you do, it means your pilot tube is not in place. It needs to sit the correct way before going any further. - Toggle with the temperature
If there is no gas smell, the knob is now sitting correctly. It’s time to set the temperature you desire. Keep pressing the knob for about one minute. Do not let go until the control light starts to blink. Now, set the temperature you want. - Test the gas to ensure there are no leaks
You may not smell any gas in the air, but still, you want to be sure. You can confirm if you have no gas leaks by using a soap test. Make a solution with soap and water and put some around the connections and valves. Check to see if there are bubbles. If you notice there are bubbles, try reconnecting the lines. If that does not work, shut off the gas and seek the help of a professional.
Is a water heater thermopile low voltage easy to fix?
If fixing the broken things at your home is not a problem, following these instructions. They will help you replace your thermopile successfully. Thermopiles are inexpensive devices. You will also save yourself the $150 it will cost to get professional help.
People tend to shy away from DIY projects like these. You may not plan to diagnose and fix your appliances yourself. But is still a good idea to know more about how they work. That way, if something goes wrong, and it always does, you have a leg to stand on with the professionals you call for help. You can contribute during the conversations. It will also be easier to get the best value for the money you have to spend on repairs.
