If the question “does my water softener need a drain?” has ever come up during your search for the right water softener for you, then this is the short answer: Yes.
Drains have to be placed on water softeners because the process of reviving the sodium ions involves flushing salty water into the resin tank, then flushing it back out as waste.
Ensuring that your water softener has an adequate drainage system is the work of a responsible citizen. It’s not something you should take lightly.
The wastewater thrown out by a water softener can prove harmful to the environment if not disposed of properly. Choosing the right water softener drain plays an important role in the community.
This article talks about the importance of responsible drainage systems for water softeners as well as a DIY installation guide.
Table of Contents
Why does a water softener need a drain?
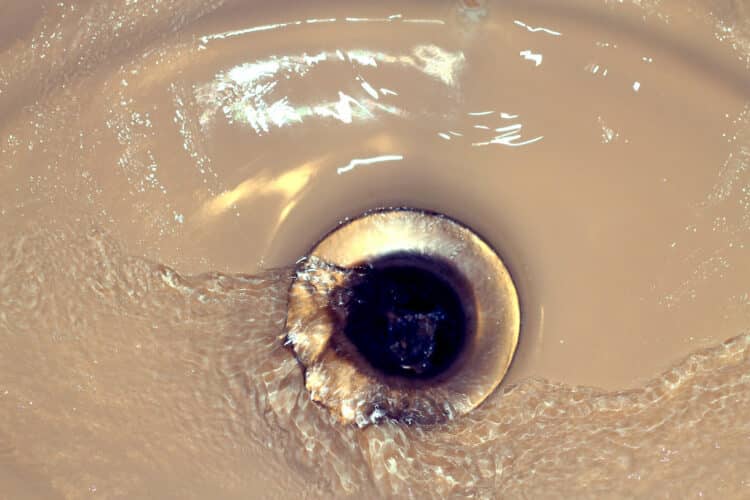
A drain leads the wastewater away from the water softener and towards the appropriate place for disposal.
A water softener without a drain will have nowhere to dispose of its wastewater, leading to issues such as overflowing.
And with nowhere else to go, the wastewater could contaminate the water supply or make its way through the pipes bringing in hard water.
What kind of water softener drain is required?
The recommended size is a ½ inch polypropylene drain pipe. Drainage pipes for water softeners need an “air gap” between the pipe and drain.
An air gap ensures the wastewater doesn’t backwash to the system again. When using this kind of drain pipe, then the following drains are recommended:
Laundry tray
It is what it is. If you don’t have a laundry tray, anything similar will do. Even a bucket can work as long as you make sure there is an air gap.
You will also have to properly dispose of the water that ends up in this tray. Otherwise, it will just overflow and you’re back to square one.
We recommend throwing it into—
A Floor Drain
A floor drain is one of the most common kinds of drains used in a water softener because it is convenient.
Once the wastewater goes down the drain, it rarely gets the chance to back up because of the air gap, and the depth of the drain.
You should be careful when choosing a drain by the floor because in some cases, it could lead to a water reprocessing facility rather than the sewer system.
More problems can arise if the drain leads to a water treatment facility because they are not usually suited to handle sodium chloride.
Be sure to check with your city ordinances before trying to use a floor drain for your water softener.
P-Traps
P-Traps are a type of piping system that prevents any sort of water from coming backwards through the plumbing.
If your water softener is underneath a kitchen sink, a P-Trap works great with an air gap fitting and prevents backwash.
There’s no need to run a completely different set of pipes just to accommodate your water softener’s drainage because you’ll have connected it to your sink’s drainage.
Where is the drain supposed to lead?
This depends a lot on your community’s rules. It has to go down the sewers, not a water treatment plant.
Some recommend an outdoor dry well to dispose of the wastewater straight through the ground, but this comes with its own set of disadvantages:
1. It can contaminate naturally occurring fresh water pockets by seeping through the soil.
2. Even if you do it correctly, it can still affect the plant growth aboveground.
3. Since it is an outdoor drainage system, you will have to consider what happens during the winter.
How to install a water softener
Installing a water softener yourself means you need to have at least an advanced knowledge of plumbing and tools. Call a professional if you don’t have the necessary skills
1. Bypass valve installation
Some water softeners already come with their own bypass valve.
A bypass valve gives you the option to cut off the water softener’s water supply in case something goes wrong or repairs and maintenance have to be conducted.
It usually belongs behind the unit. Secure it with the clips it came with.
2. Connect it to the water supply
You can either connect it to the main water supply, or use supply tubes to feed it water. Supply tubes are recommended for easy removal.
Before you do this, make sure you’ve shut off the entire household’s water supply and empty the pipes so that water doesn’t come splashing out.
You will have to install adapters so that the flexible supply tubes can connect to the water supply line. Get the right adapters, which will depend on your pipes.
The pipe leading to the house’s supply should be connected to the water softener’s outlet port, while the water supply pipe is connected to the inletport.
This ensures the entire water supply passes through the water softener before it is sent throughout the entire household.
3. Connect the tanks
Sometimes, the brine tank and mineral tank don’t come connected. The unit should come with tubing to connect both tanks.
Secure with hose clamps.
4. Ensure the drain tubes are connected
There are usually two drain tubes found in a water softener. One of them is connected to the control valve and voids the backwash during a regeneration cycle.
The other tube is attached to the brine tank and is where overflows pass through.
The two drain tubes are connected to the same drain, but are never supposed to be connected to each other.
Remember, an air gap is important when deciding where the wastewater should drain itself.
5. Start up the water supply
Do it, but slowly. If you immediately start off with the entire water supply, pressure can build and ruin the pipe fittings.
On top of this, air could be pushed into the water softening unit. Keep a tap open to avoid pressure from building.
After this, switch on your water softener and establish the needed settings. Add in your salt/potassium pellets according to the recommended amount.
6. Do a backwash cycle
A backwash cycle prevents air buildup and allows the resin beads to move around and settle. During this process look for leaks and once it’s done, give the brine tank a last-minute check.
Installation Tips
1. Install the water softener close to the water heater to maximize water pressure and prevent the formation of hard lime scale deposits.
2. Take into account what happens during cold weather. Protect the unit and its pipes from freezing.
3. Install the appropriate valves to gain more control over your unit. This will come in handy during emergencies and repairs.
4. Keep the brine tank and the water softener close together. This reduces regeneration time and allows for easier cleaning.
5. Use a 3/8 inch O.D. polyethylene plastic tube to connect the brine tank and the water softener.
6. Ensure that there are no folds or leaks in all of the tubing involving your water softening system. Even the smallest fold or leak can affect the effectiveness of the entire unit.
7. Use a ½ inch I.D. drain line for the brine tank’s overflow drain. Don’t forget about the observation of an air gap.
How much water is drained by a water softener?
It will depend largely on the water consumption of your entire household.
During a regeneration cycle, it can use between 20 gallons to 50 gallons of water depending on its size and grains capacity.
Can I drain my water softener outside?
Yes you can, but make sure you check with your local community’s laws. It is illegal in some states, but allowed in others.
Be warned that draining it outside via a dry well can come with long-term negative effects. Plants may not be able to grow aboveground due to the leeching of the sodium from the wastewater.
Furthermore, it can also leech into other naturally occurring water sources underground. A single teaspoon of sodium chloride can ruin 5 gallons of water.
Frequently Asked Questions + Troubleshooting
Why does my water softener keep draining?
It is possible that the unit got stuck during regeneration and is unable to move on to the next phase.
Adjust the settings on your unit by bypassing the entire regeneration process. If it doesn’t resolve itself after a reset, then contact a licensed technician to do repairs as soon as possible.
How long should a water softener backwash?
It shouldn’t take that long. Backwashing takes about 10 minutes maximum.
Of course, times will also depend on the age, make, and model of your water softening model.
If it’s gone on for more than 30 minutes, it could be repeating the process again. You will have to bypass the regeneration cycle and try to restart.
Backwashing is part of the regeneration cycle. It is when the water in the resin tank moves in reverse from the bottom up to flush anything that settled beneath the tank out towards the drain.
How long can a water softener drain line be?
The shorter the better. It should not go beyond 30 feet, and should stay as low as possible.
If it is positioned any higher than 8 feet off the ground, it runs the risk of backwash back into the water conditioner.
Can you shower when your water softener is regenerating?
It is not recommended unless your water softener is dual tank. Otherwise, you invite hard water back into the pipes, which will bring you back to square one.
Just wait until the regeneration cycle is finished.
Should my water softener recharge every night?
That is not a healthy schedule for a regeneration cycle. A water softener should not regenerate daily.
This puts a huge toll on the resin beads, and could mean that your water softening unit cannot handle the grain capacity of your household.
Trade it in for a larger model that can fully accommodate your household’s average weekly consumption.
Conclusion
Some water softeners don’t come with drains, but that’s because they don’t really “soften” water. Instead, they act like water filters instead.
Familiarize yourself with your community’s laws on the drainage for water softening systems. Even connecting the drain the septic tank or system can lead you to a whole host of problems.
If all else fails, then there will always be the use of floor drains, dry wells, and laundry trays (or buckets).
When you need help installing your water softening system, call licensed professionals to do it instead. It will save you worry, time, and effort.


