If you’ve ever wondered about how to install a reverse osmosis system in your home, you may be in for a surprise.
You might think it’s not an easy task to undertake, but with a lot of elbow grease and a little bit of patience, you can set it up skillfully.
There are many types of water filtering systems that you can choose for your home, but the reverse osmosis water system installation is the best one.
And it provides one of the best water filtering solutions. In this specific process, a membrane that’s semi-permeable can remove ions, molecules, and larger particles in the H2O.
Reverse osmosis has many more positive attributes compared to the other types. It’s because it has five levels of filtration that get rid of damaging pollutants like lead and other heavy metals.
There aren’t many components in a typical home reverse osmosis system installation.
This way, it makes easier maintenance and cleaning. And it is EPA (Environmental Protection Agency) approved.
This type is cheaper than an ultraviolet disinfectant system and more efficient than a carbon or charcoal filtration process. It is best applied to water that’s previously chlorine treated.
However, it is sometimes ineffective, wherein it can use up to three gallons to yield one gallon of filtered H2O.
Table of Contents
What is reverse osmosis?
It is a process to get rid of contaminants in the unfiltered water, which goes through a semi-permeable membrane. The water flows through a more concentrated portion of the membrane to strains out more pollutants. Then go to a less concentrated portion to produce purified water.
The leftover concentrated H2O is waste and called brine water. And the cleansed water is known as permeate.
The membrane has tiny pores that barricade the pollutants but provides access to water molecules. In the process of osmosis, H2O becomes concentrated as it goes through the membrane for both sides to gain balance.
With reverse osmosis, it blocks off the pollutants from passing through the less concentrated portion of the membrane.
A great example of this would be when saltwater passes through the membrane. As pressure is enforced, the salt stays behind and the only properly cleansed H2O gets through.
How RO water filter works
The RO system works by getting rid of chlorine and sediments from the H2O via a pre-filter before it enables water to get to the membrane to take away dissolved solids.
After water comes out of the membrane, it will worm its way through a post-filter to polish it, before it comes out of the spigot. It has many levels, which will depend on the amount of pre and post-filters.
Its different filters
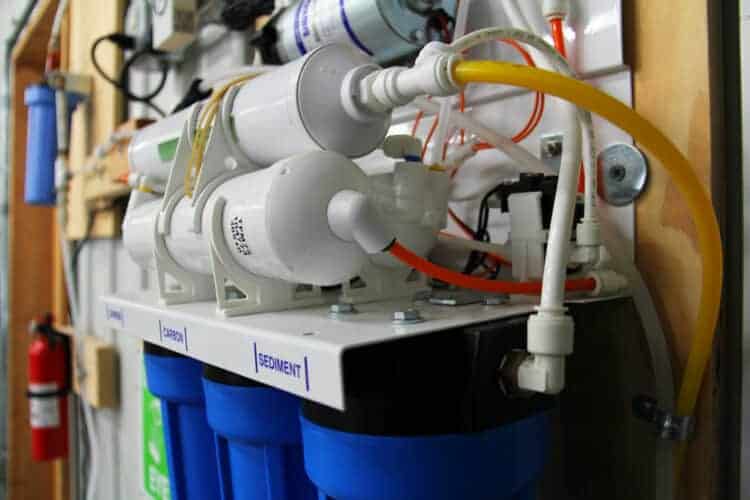
- Sediment filters- This filter type filters out particles like rust, dirt, and dust.
- Carbon filters- It gets rid of VOCs or volatile organic compounds, chlorine, and other pollutants to makes the taste and smell of the water bad.
- Semi-permeable membrane- It gets rid of seventy to ninety-eight percent of TDS or total dissolved solids.
Its advantages
- It has a powerful filtration capability that can get rid of difficult to remove contaminants like bacteria, mercury, lead, etc.
- Longer lifespan can reach two to three years because its membrane is always washed.
- Its output is the freshest, cleanest and purest water to drink.
Its disadvantages
- It cannot entirely get rid of chlorine, organic chemicals, pesticides, VOCs or volatile organic compounds, and solvents.
- During the filtration, it lets out excess brine water.
- It will lower the pH level and removes crucial minerals the body needs.
- The whole enterprise is costly.
Where to install it
The best location to set it up in a typical home is the kitchen sink. However, some households have a smaller kitchen and don’t have large enough space to accommodate it.
Another area that you can set it up is the garage, basement, or utility room. If you opt to use those spaces, then you need a delivery pump.
The vital thing to remember is that you have to set it up in a cold water line below any other filtering device that you will use in conjunction with the RO, like a softening system.
Lastly, never install it in areas that have freezing temperatures.
How to install a reverse osmosis system
You should learn how to make an RO system at home, specifically under the sink, since it is the location where families usually draw water to drink and cook. There also other RO systems that you can set up for the whole house, but the under-the-sink unit is easier and typical in most households.
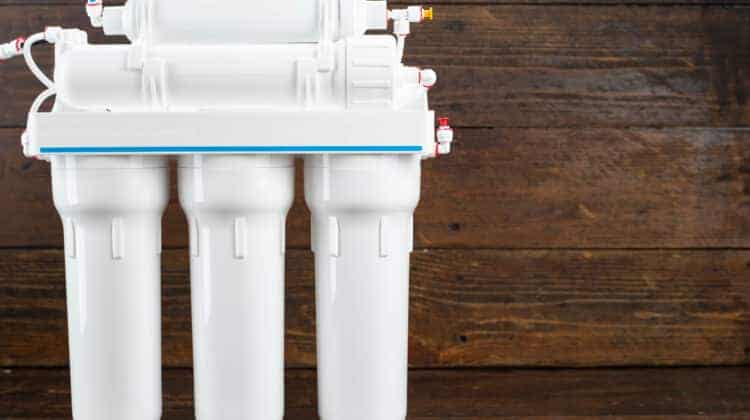
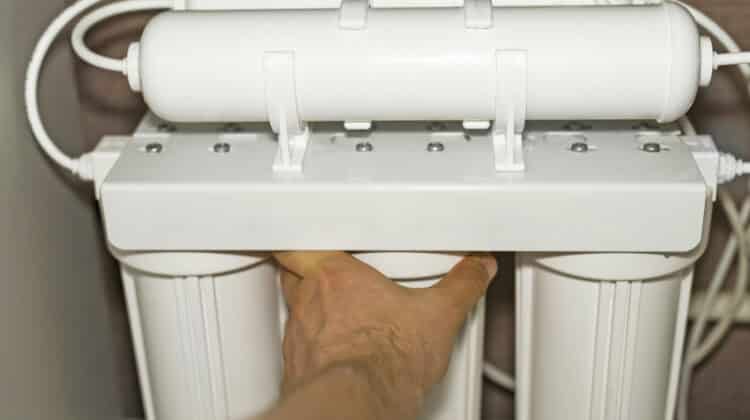
This particular unit has four or five canisters that filters out water and each has a task in filtering specific kind of contaminants. Then it has a storage tank that contains the purified H2O.
There is also spigot that pours out the filtered water that is separate from the kitchen faucet.
Even though the science of the RO water system installation diagram might look complex, the reverse osmosis installation instructions is reasonably straightforward. If you are adequate plumbing skills, then you can set it up yourself.
Materials and equipment that you will need
Materials
- Adapter tee
- Reverse osmosis filter kit for installing under the kitchen sink
- Seal tape or plumber’s pipe
Equipment
- Screwdriver
- Measuring tape
- Level
- Hacksaw
- Adjustable wrench
- Channel lock pliers
RO water purifier installation guide
Step one: Planning the installation
It is still the planning stage, so at this point, you haven’t bought an RO system yet and want to get one. You have to check if there is enough room below the kitchen sink to fit the filters and tank.
You need to measure that space since your sink may already have other attachments like a garbage disposer that might make the filters difficult to fit.
You also have to be aware of how your home’s source of cold water can be utilized. It is because some RO units can attach themselves to the water line going towards the faucet. The device used for this is called a tee connection.
While other RO systems utilize a flexible line that comes directly from the kitchen faucet. Wherein the adapter tee right above the shut-off valve is used to draw water for the filtering system.
Step two: Preparing the reverse osmosis unit
At this stage, you have found out that there’s enough space under your kitchen sink, which you can attach to the RO system. Let it out of the box and check again if it fits on the spot you’ve pre-selected.
Do it with all the unit’s attachments and components. This way, you will be aware if it would be necessary to make adjustments on the drain or water pipelines. If that is the case, then you will need help from a plumber.
Many RO units are designed for under-the-sink installations, but they can also be set up in another place in your house, like a garage or workshop. Then be connected to the location of the sink.
The filtering system has to be set up along the cold water pipeline. And if you have a water softener pre-attached, be sure it is past that.
Installing it in another location aside from the kitchen sink will not take up space below it. However, more work is necessary since it necessitates extra tubing to attach the components to the unit.
Step three: Attaching the spigot
The sink spigot is the first component that needs to be attached because if you do it last, its tubes may not be able to fit and get crowded underneath the sink.
Attach the spigot to the sink countertop. There should be accessories provided along with the kit.
Your sink may have an existing orifice to accommodate the spigot. It is usually reserved for a sink sprayer. If not, then you need to bore a hole on the countertop to be able to fasten the spigot.
Insert the water line downwards through the hole and attach it to the air gap and into the kitchen faucet. It has to be done before fastening it permanently to the housing.
Step four: Positioning the tank
At this point, you will be putting the RO tank below the kitchen sink. Before doing it, set up the tank connector first.
Get the plumber’s seal tape and apply it along the threads on the nipple of the tank. Then fasten the spigot connector on the tank and be sure they aren’t cross-threaded.
The connector should be threaded on very easily, and be sure it is fastened securely.
Step five: Mounting the filter and its accessories
Take out the cover from the filter assembly and put an indication on the wall underneath the sink for the hanger washers. The measurements of the assembly have to be fifteen and a half inches more or less from the flooring. It enables enough space to take out the filters for maintenance purposes.
Fasten the hanger washer on the wall at the indicated spot. Then proceed to install the RO unit assembly onto the washers.
Step six: Fasten the water line
You will notice a thin water line from the assembly, measuring one-fourth inch and usually green in color. You need to attach it to the water supply line. Before doing it, shut off the water supply first.
If the kitchen sink utilizes a flex line measuring one-half inches, then your one-half-inch adapter will work fine with it. However, if the sink uses different-sized tubes, then you will need an adapter tee to enable the changeover to the water supply line going to the filter unit.
The green water line is fastened to the adapter tee using an insert, nut, and ferrule.
Step seven: Fastening the other tubing
The configuration of the tubes may have different sizes due to their manufacturers.
They constitute one tubing from the water supply going to the filter unit’s first canister. It is known as the pre-filter.
Another one coming from the last canister filter, which is known as the RO canister, going to the drain. And another tubing going to the storage tank.
The last tube will run from the storage tank going to the countertop towards the spigot. The pro series 5 stage reverse osmosis system installation instructions state that the storage tank should go through a filter that polishes the water before going to the spigot on the countertop.
Since the configurations of the tubes might differ due to the manufacturer, you should always confer with its user’s manual to know to correct connections for the tubings.
For tubing connections, the longer ones are more advantageous. Since you can run them behind cabinets or anywhere necessary to get a cleaner installation. Be sure to leave it on a considerable length behind if you need to transfer it again later.
You can also cut it to the correct measurements to get a more concise appearance. Also, follow the instructions from the manual to sanitize the whole system first before attaching the tubes.
Step eight: Connecting to the drain
There is a type called a whirlpool RO system, which includes a drain tee. Put it against the drain pipe and make a marking so that you’ll know where to cut the pipe.
Use a hacksaw to cut the pipe and be sure the tee can fit securely. Then fasten the drain tee of the filter to cut the pipe along with the nuts and washers. It follows the same assembling procedure as the drain trap. Lastly, push the drain tube of the filter in the adapter tee.
Step nines: Make a pressure test
It is the last stage in learning how does a reverse osmosis unit work, wherein you will need to do a test.
Switch on the main supply line, thus opening the cold water on the kitchen sink. It will enable to let out any air from the pipes. The pressure will begin to develop in the system.
You will need to wait for two hours to get the full brunt of the pressure.
After reaching full pressure in the system, get back to the attachments and look for any loose connections, and tighten it if you find one.
Before utilizing it for drinking purposes, drain out the system by switching on the spigot. It will purge the system entirely and leave it that way for twenty-four hours.
The water will slowly trickle after the tank is emptied. At this stage, continue to check for leaks.
Conclusion
Wherever the source of water you have in your home, there will always be pollutants in it. However, if you care to get clean drinking water for your family, use an effective water filtering system, and an RO unit is the most beneficial one.
